Hello again! Today I'm trying my hand at a tutorial-style post showing my technique for basing miniatures. You'll note BattleTech will be dominant in this thanks to needing to fill some gaps in their hex bases (and because I freakin' love BattleTech!), but any miniatures that require some base gap filling or even not should be well-served by this technique.
 |
| Here is what you'll need. Your miniature, some PVA glue, some super thin cyanocrylate (CA) glue, some railroad ballast, and something to spread the PVA glue around (I use an old paperclip) |
 | ||
| For starters, these are all we'll need |
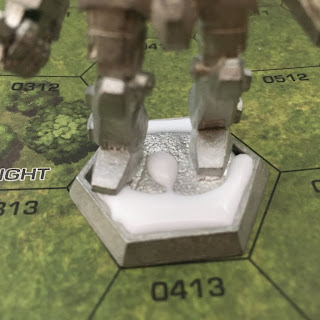
So, after you've attached your mini to it's base, you'll be looking to use the PVA glue to fill in those gaps as well as to give the railway ballast something to hold onto. I apply most of the glue to the gaps, but also apply a dot on the sculpted-on base between the miniature's legs.
 |
| Off to a good start! I used some extra glue by the mini's right foot to account for the overhang from the foot |
Once you're satisfied with the amount of glue, we'll take our spreading tool to push and pull the glue into all the gaps and provide an even covering all over the base. I would recommend less being more initially, as having too much PVA glue will sabotage you later in the process.
 | |
| All smoothed and spread out |
Now, I just do a sweep of the base through my cup of ballast. You want to make sure the entirety of the base is submerged in the ballast. No need to let it sit for any extended period, the ballast will grab onto the PVA very easily.
 |
| You should be looking about like this |
Now, the next part is fairly important. I use a putty sculpting tool to "push down" the ballast that will have crept up the feet of the miniature. There is enough capillary action with the PVA for it to slightly ascend up the surface of the miniature's feet where the foot is sculpted onto the mini-base. Leaving it as is results in a fairly unnatural appearance, though I suppose it could be good for a muddy/swampy terrain theme.
 |
| With the offending PVA/ballast pushed down. |
The last step will call for the extra thin CA glue. As soon as you are satisfied with how the ballast looks (be certain, as your choice will soon be very difficult to correct), take the CA glue and just apply maybe 2-3 quick drops. I don't rightly know what the ballast is made from, but it sucks up liquids like a sponge. The CA with very quickly spread throughout the ballast and rapidly harden into a protective shell. I find great value in this as PVA glue likes to contract as it dries, leaving you with odd gaps and "pits" in your mini base you'd swear weren't there a couple hours ago.
 | |
| See how the glue looks compared to the above picture? Liar. |
As the above video hopefully shows, the glue and ballast dries literally within seconds into a fairly durable shell. Now, I'd be remiss if I didn't mention that very rarely I have issues with this technique with the ballast shell peeling back slightly at the corners, I've been able to glue them back down each time, but it's still something of a pain. Again this is rare, and my best guess is it has something to do with the amount of PVA glue underneath the ballast shell. Too much, and it gives too much wriggle-room for the ballast to shift as the CA glue dries. Be warned.
 |
| This technique also works on flat bases, only difference is using less PVA and making sure to spread it out well |
 |
| Works well on things other than giant walking tanks too! |
These are a few examples of what these bases look like painted. Depending on how heavy handed you are with the CA glue, you can fill in many of the details between each individual fleck of ballast, or leave them fairly distinct. You'll quickly get the hang of what amount yields what result!
Thanks for looking! I hope this is of some use to you.


No comments:
Post a Comment